Overview
The Graphing in Groups application can be used in individual mode to learn about points, lines, and functions. When used in individual mode you will have a primary point (labeled with your name) as well as a secondary point (labeled Point A). You can toggle between the points by changing which point is active. Beyond this, the application works identically in the way that points are moved, locations marked or photos incorporated. The following section contains step-by-step instructions for use of individual mode.
Basic Operations
Welcome screen
When you launch the application you will be presented with a Welcome screen. You should enter your name or initials, then press the Open Graph Window button. The name you enter on this screen will appear next to one of the points on the graph and in the Active Point menu.
Graphing screen

The adjacent image is a screen shot of the main graphing window as it appears on an iPad. The name you entered appears beneath the point located at the center of the graph (0,0). There is a second point, A (3,-2), that you also control, for the purposes of forming lines. The screen contains the following items:
- Top menu bar with settings buttons for NetLogo and the Graph
- Mark, Photo, and Album buttons on the right
- A display rectangle that shows information about your point, group, position, and equation
- Arrow keys in the lower left for moving your point(s).
- Active point selection in the lower right.
Each of these items will be discussed below
Moving Points
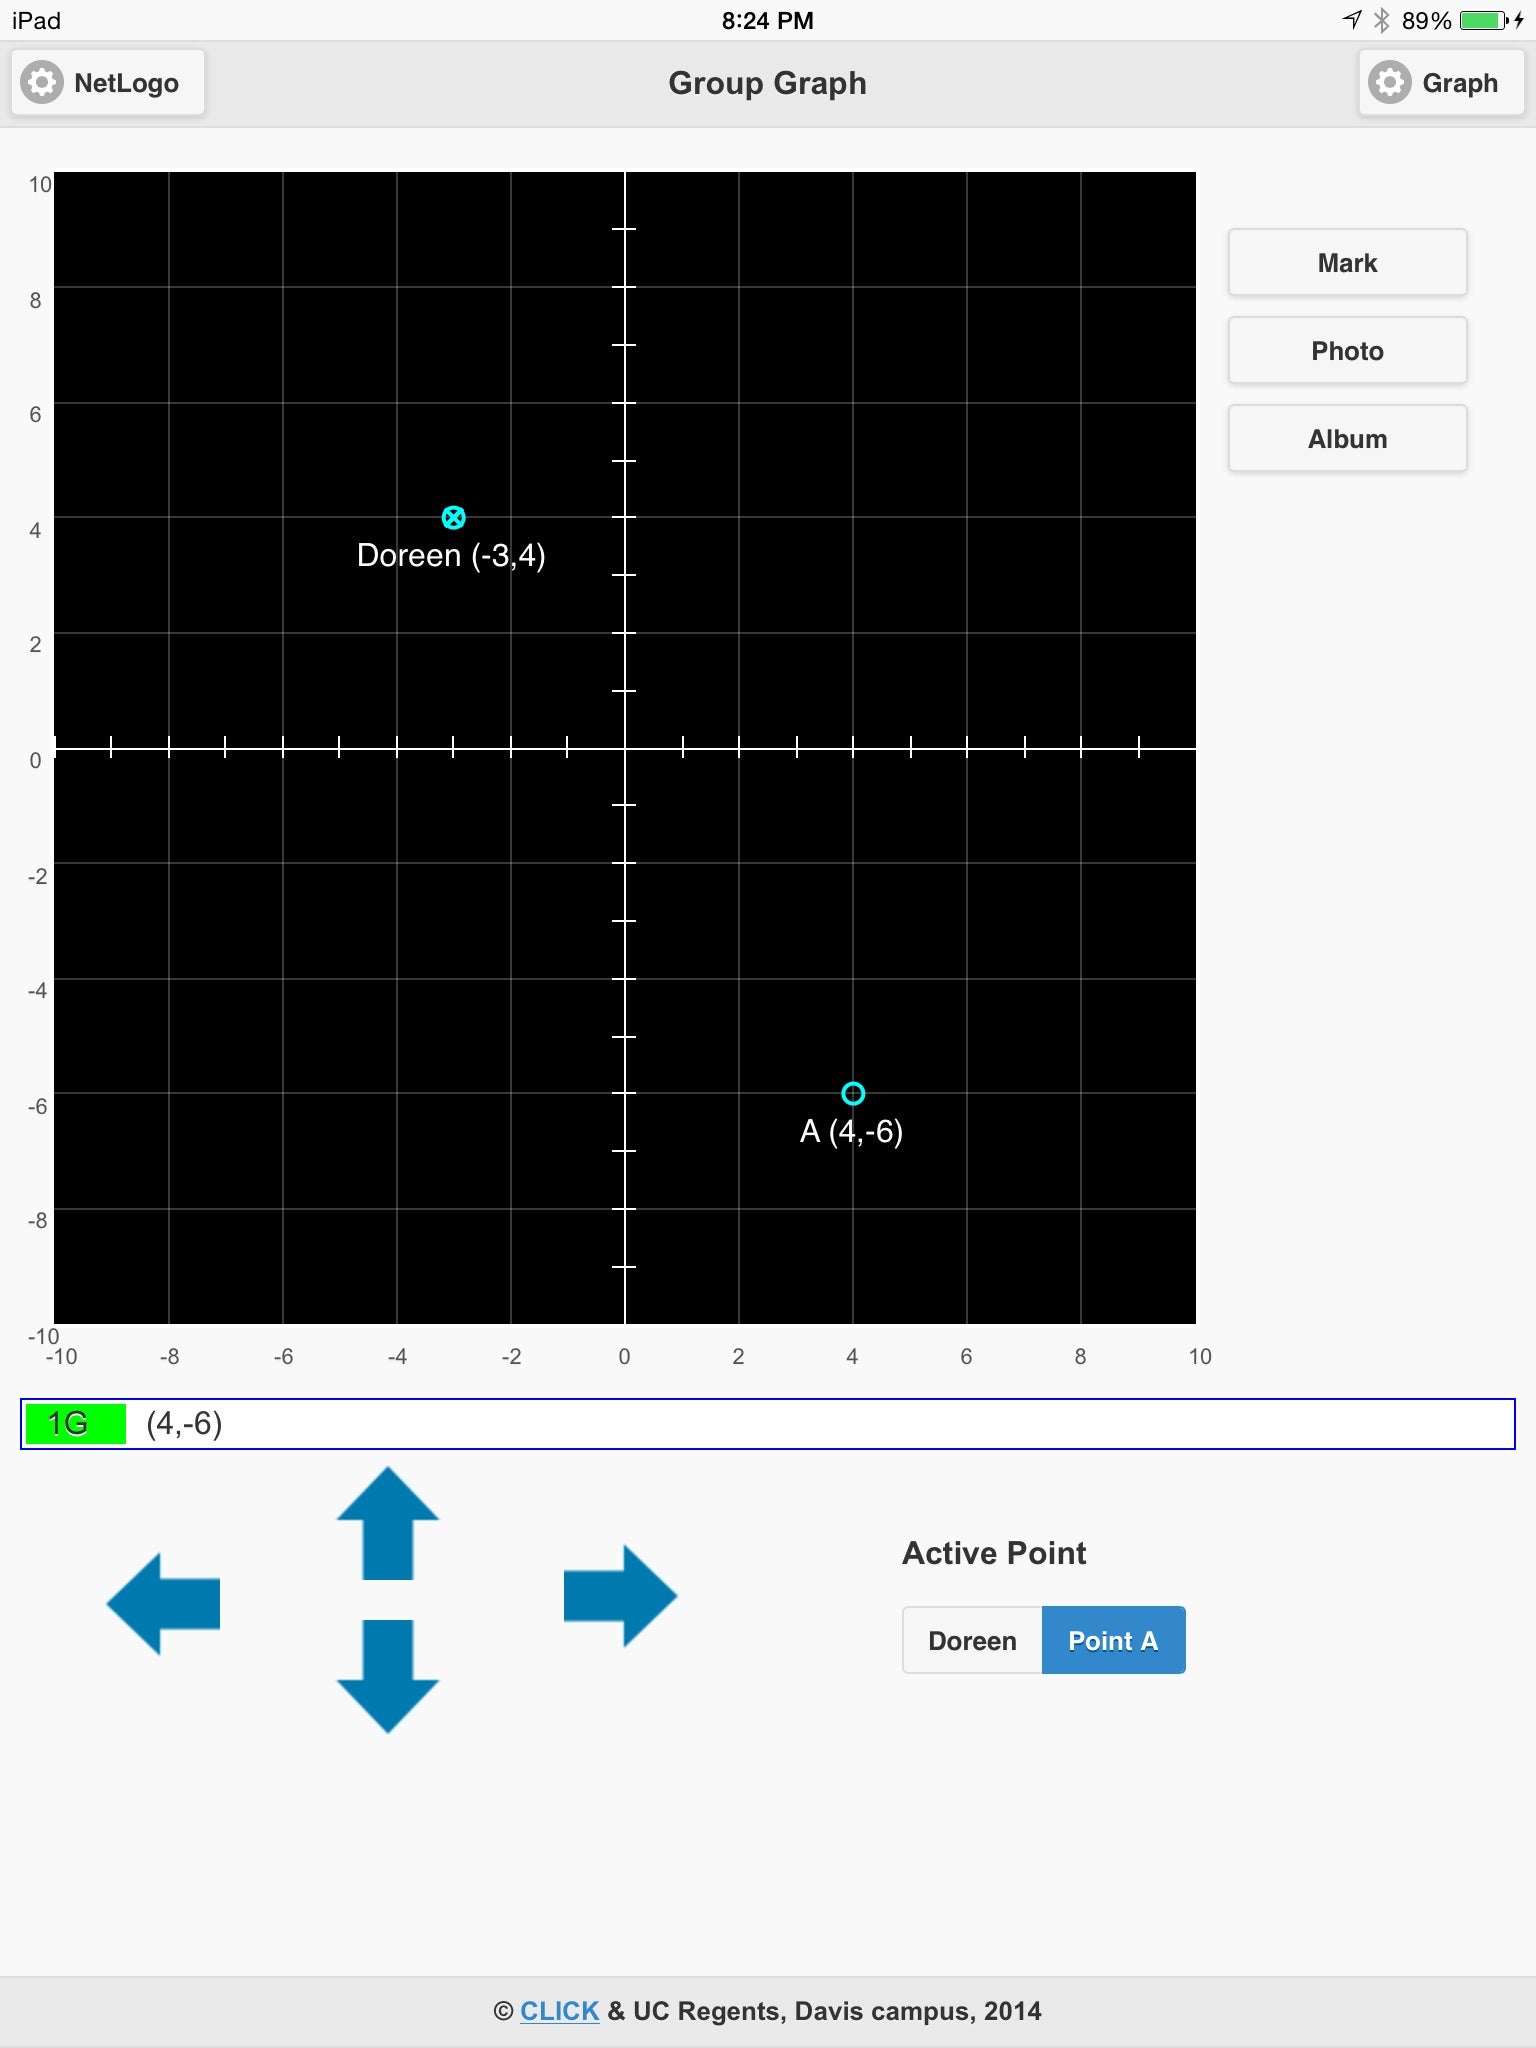
In the image to the right, both points have been moved away from their starting locations. Points are moved by entering sequences of taps on the four arrows in beneath the graphing window. Each time you tap on an arrow, the active point will move one unit in corresponding direction. To move Doreen’s point to position x=-3, y=4, required three taps on the left arrow, and four on the up arrow. To move the point A you must first change the Active Point from Doreen to A. This is done by tapping on appropriate button in the lower right.
One additional command is demonstrated in this image – the Mark command (to the right of the graph), when pushed it leaves a small X in the center of the circular point.
Creating Lines
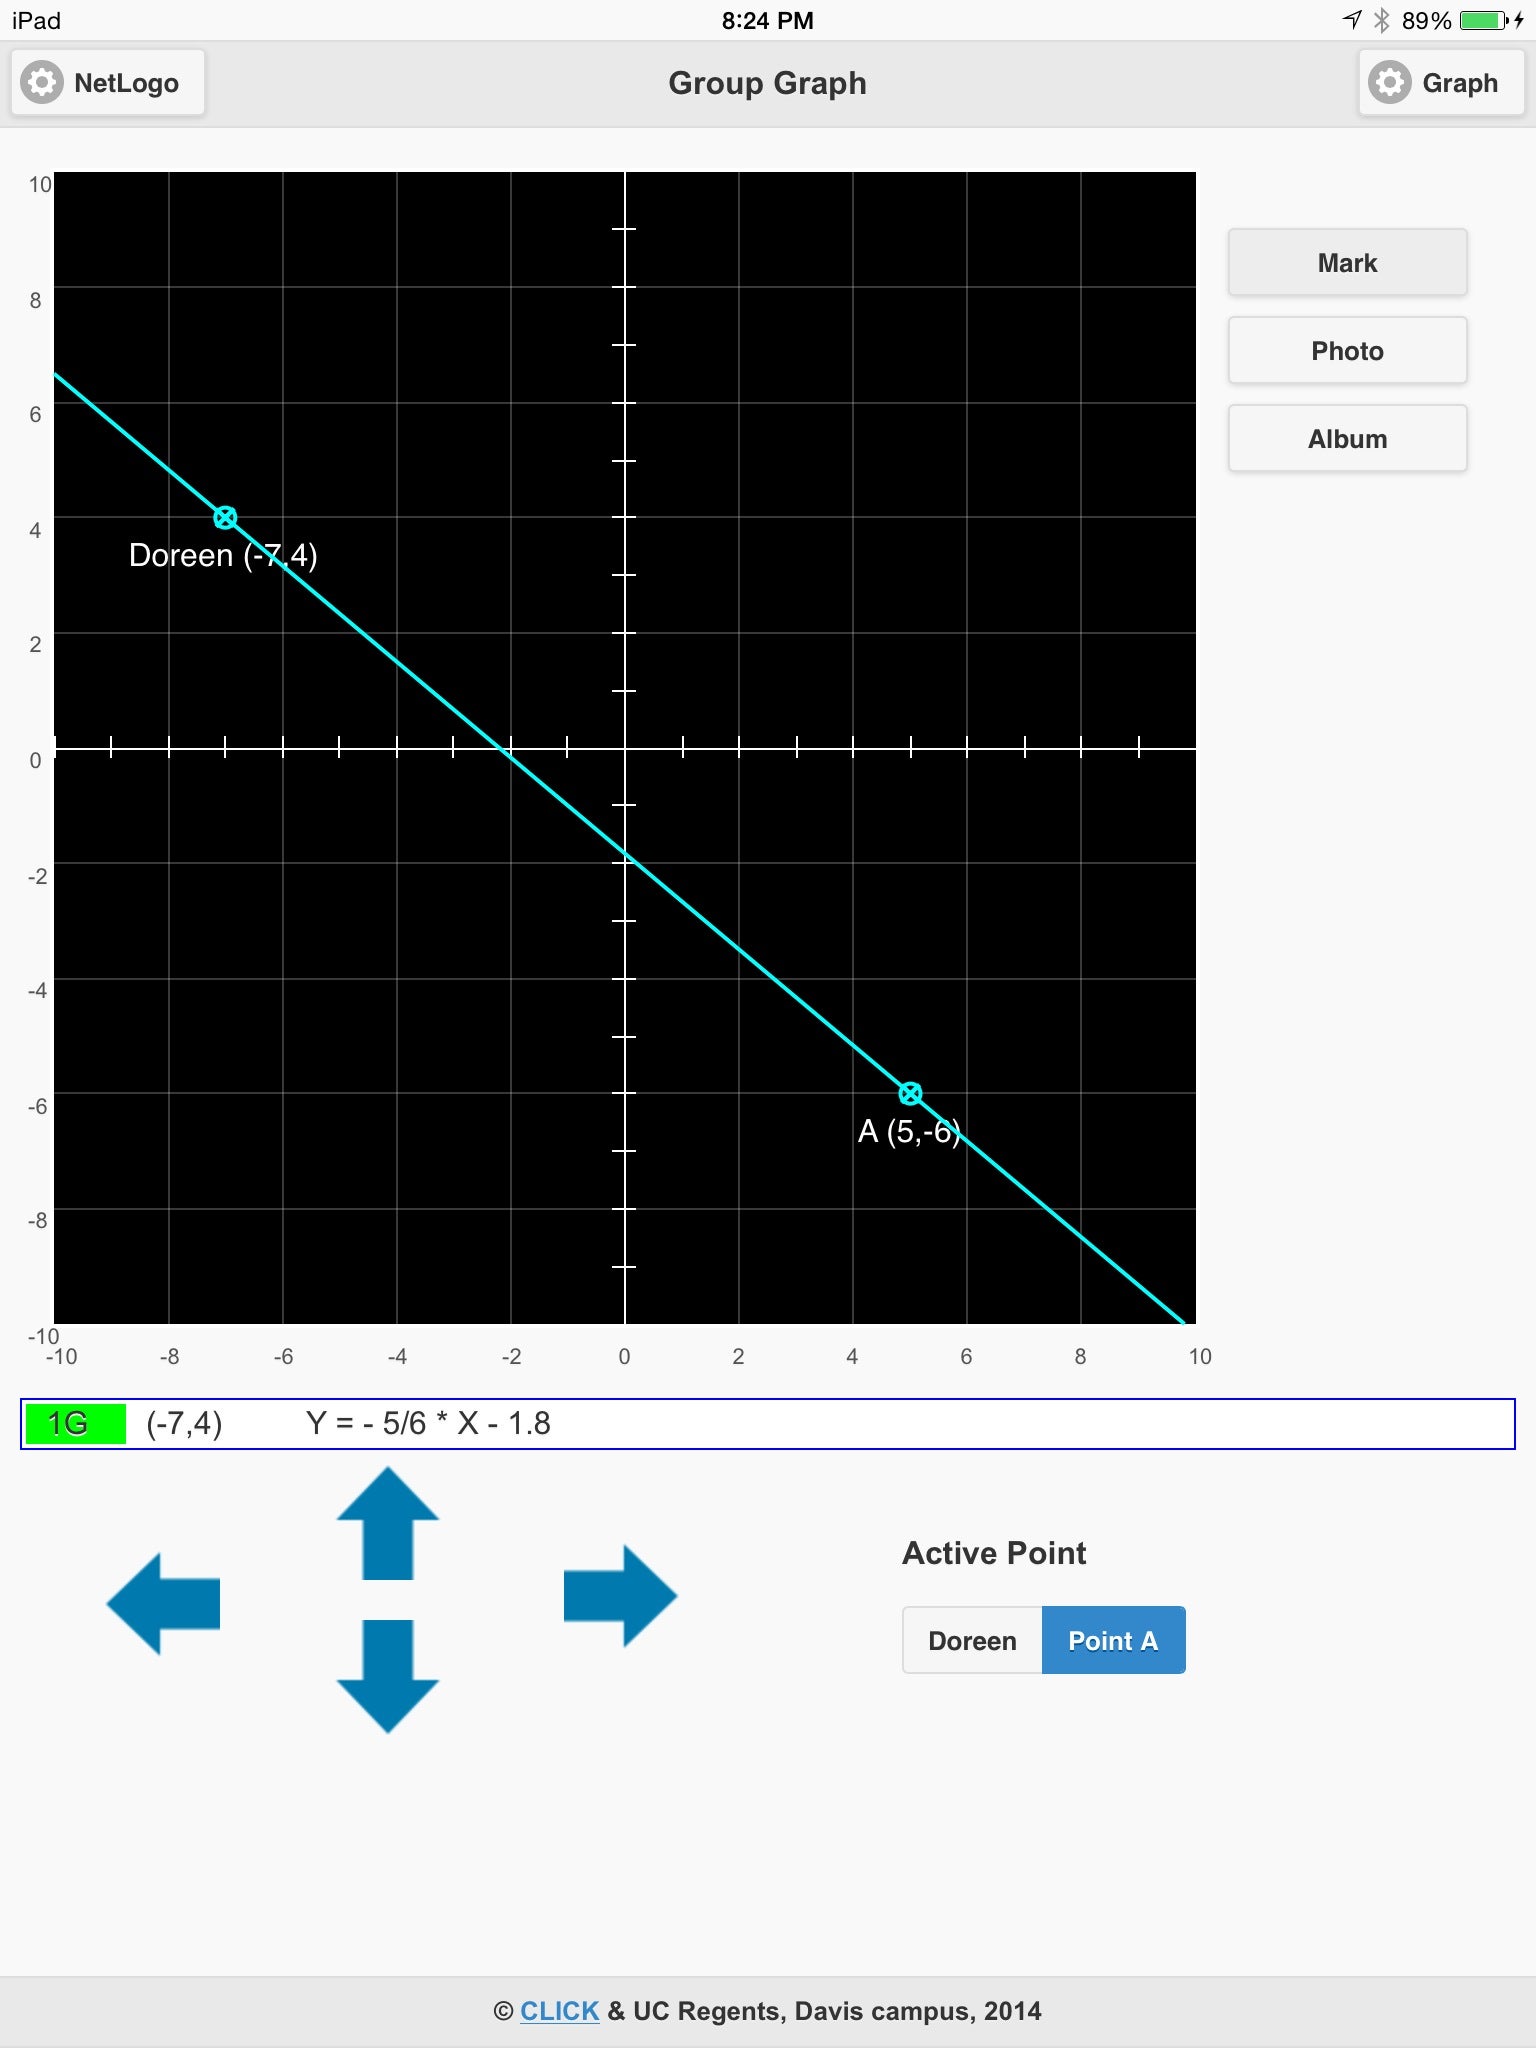
Lines are formed by pressing Mark for each point. The line will be drawn between the two locations (small X’s) last marked. To update the line, move one or both points to new locations, then press Mark. When a line is displayed on the graph, the equation of that line will appear beneath the graph window. The equation is in the form Y = m * X + b, where m is the slope of the line, and b is the y intercept. Each time Mark is pressed for either point, both the line and its equation are updated.
Using Photos
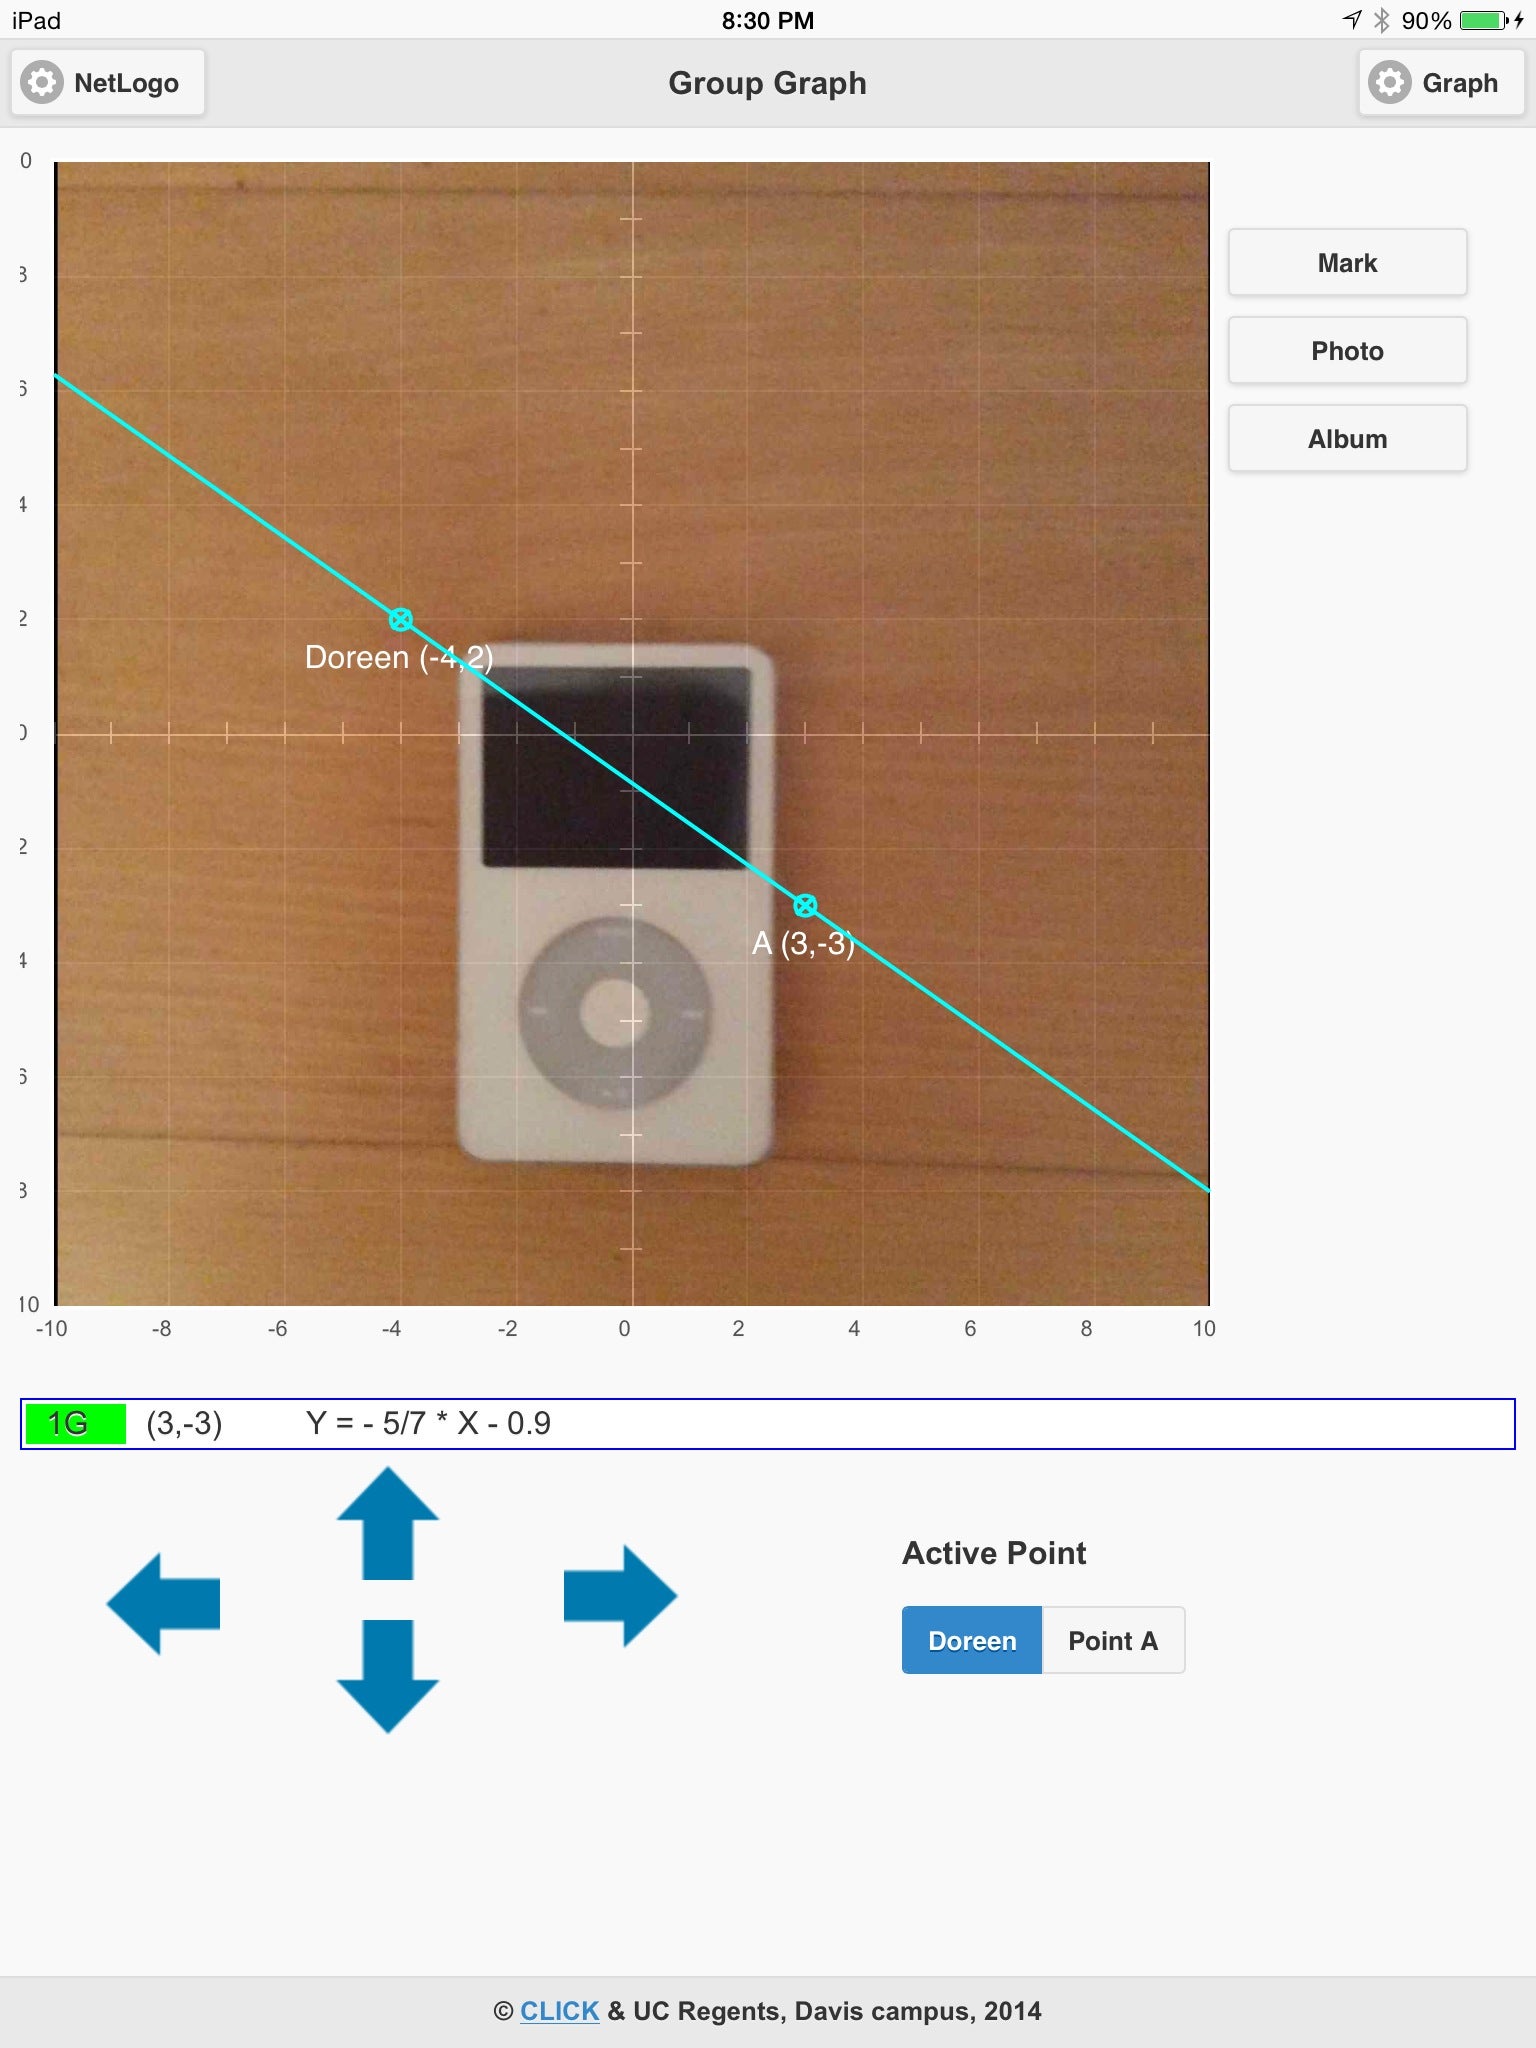
All iOS devices have built-in cameras. The devices’ camera can be used to generate a background image for the graph window. The image to the right illustrates the use of the camera to place an image of the original iPod at the center of the graph. The line overlaid on the image could be used to calculate the aspect ratio of the iPod’s screen. The Photo and Album buttons to the right of the graph window allow you to take new photos or use previously collected photos, respectively.
Note: the first time you access you photo album, you may be prompted by iOS to adjust the privacy settings to allow Graphing In Groups to access the album. Navigate to Settings > Privacy, then click On to the right of Graphing In Groups.
Zooming
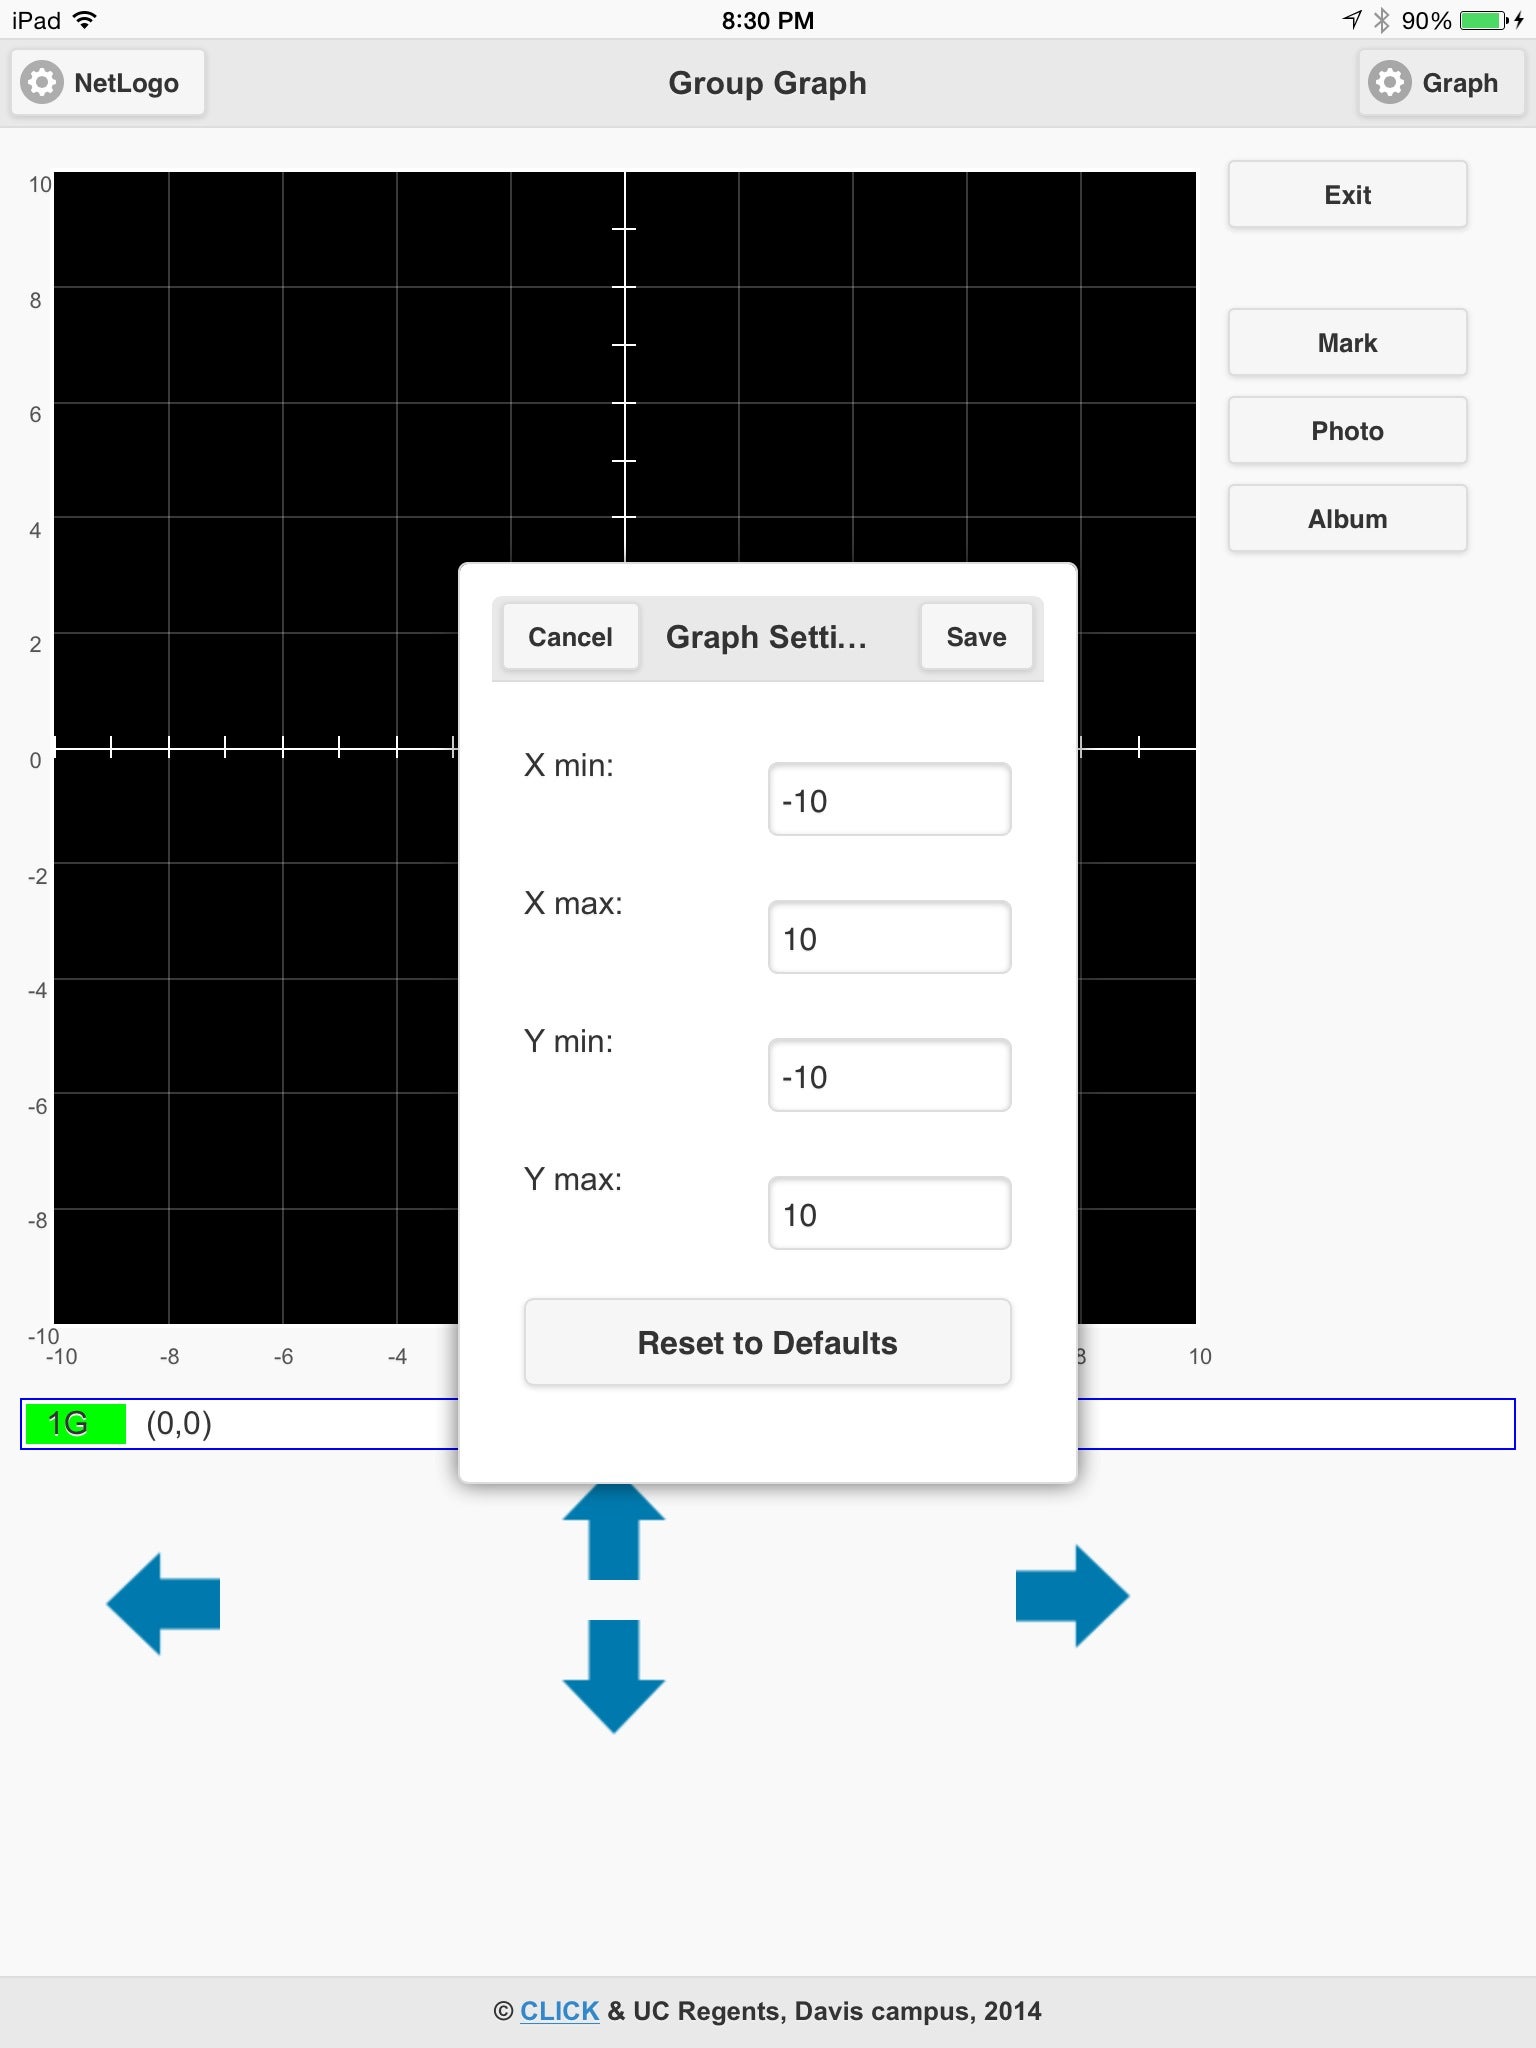
When Graphing In Groups launches, its graph window has both X and Y coordinates systems running from -10 to 10. These dimensions can be adjusted into order to zoom in or out on regions of the graph. To change the coordinates of the graph, tap on the Graph button in the upper right corner of the display. This will expose a popup window as shown to the right. Settings for X min and X max will determine the left and right edges of the graph in the horizontal dimension. Y min and max will determine the top and bottom edges respectively.
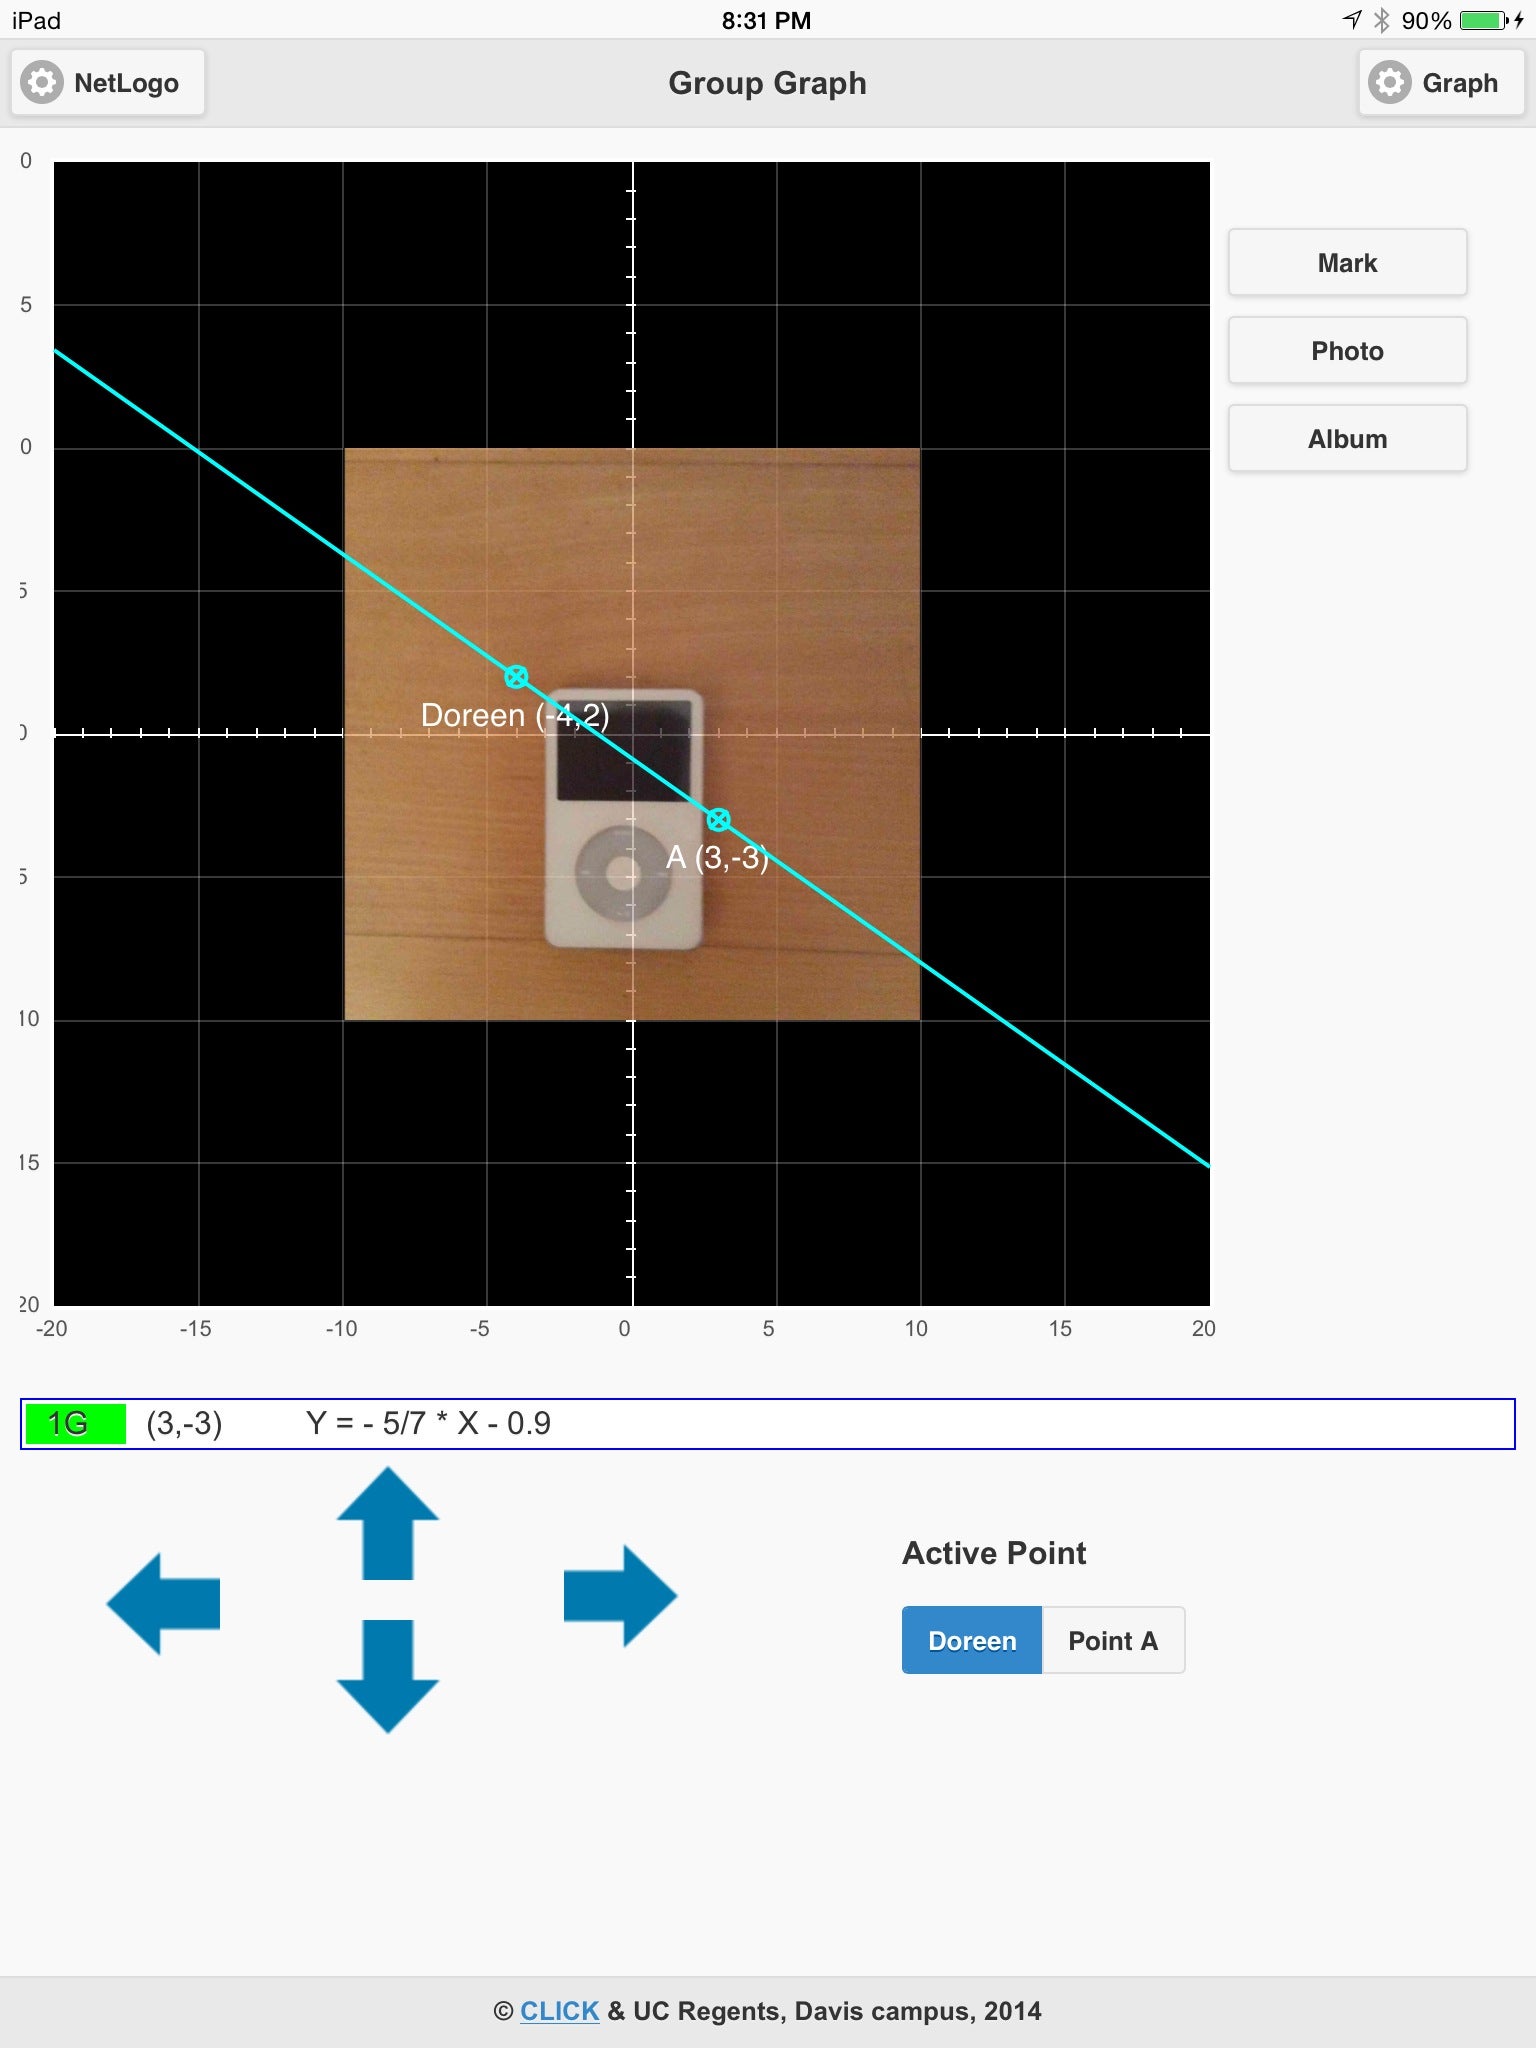
The screen shot to the right illustrates the effects of zooming out by altering the graph X and Y minimum and maximum coordinates to be -20 and 20 respectively.